Do you want to make a big difference in your kitchen? You might want to learn how to paint kitchen cabinets. You might not be able to afford a full kitchen renovation, but painting your cabinets can make the room feel lighter and brighter. Even though it takes a lot of time, painting kitchen cabinets is a simple makeover that most determined DIY-loving homeowners should feel comfortable doing.
Another benefit is that it’s not too expensive (especially when you think about how much new cabinets cost), completely changes the look of your kitchen, and you’ll probably be very proud of your do-it-yourself cabinet painting job. The kitchen is often called the “heart of the home,” so taking care of its appearance and making it a place where you, your family, and your friends want to hang out could give you a big return on your investment. Here are some things to think about before you begin.
Why might I want to paint my kitchen cabinets?
You’ve seen how painting a room or an old bookshelf can make it look great. The cabinets in your kitchen are the same. Colour tastes change over time. The dark wood you fell in love with for your kitchen may still be in great shape, but it might not make you think of the light, airy space you want to create based on the modern designs you see every day on Pinterest or Instagram. And since painting cabinets only costs a few hundred dollars compared to the thousands of dollars it would cost to replace them, this project is a good option for people who don’t want to do a full kitchen remodel.
Is it possible for me to paint my kitchen cabinets?
Even though painting kitchen cabinets isn’t hard, make sure you do everything the right way by following these steps. Now is not the time to rush things. A partner is helpful for this project, but it’s not necessary to have one. For those who are driven and good with paint, this might even be a weekend project, but it depends on how big your kitchen is and how fast you work.
Of course, painting more kitchen cabinets will take more time. It’s also important to have a lot of room to lay out your cabinet doors so that you can sand, prime, paint, and let them dry between coats. To get a better finish, you need to be more patient.
Can I just paint over my kitchen cabinets?
Beverly Sills, an opera singer, once said, “There are no shortcuts to any place worth going.” There’s no reason to paint cabinets that already have a coat of paint on them. It might seem like a good idea to save time by painting over cabinet colours that are already there, but this can make it harder to get the look you want. “Even with several coats of paint, the old colour can change the way the new colour looks,” says Sarah Barnard, an interior designer who is LEED and WELL AP certified. “The extra layers can make it harder for the coating to stick evenly, even if the base colour is white or neutral,” she says. “This makes chipping more likely in the future.” The extra layers can also mess up the texture, making the finish less smooth and even.
“It’s tempting to paint over old paint on kitchen cabinets, but it can cause problems in the future,” says Moe Soloff, a kitchen specialist at Fabuwood, a company that makes cabinets. Soloff says that adding more than one layer can make the doors too thick, which can cause problems with alignment and functionality. He goes on to say, “Also, if you don’t clean and remove the old colour, any leftover oils or dirt can make it harder for the new paint to stick, which can cause peeling or an uneven finish.”
What do you paint your kitchen cabinets with?
It’s important to use the right kind of paint when painting cabinets. Stephanie Calderon, owner and principal designer at Stephanie Calderon Interiors in Charlotte, North Carolina, says to think about how the room should work first and then how it should look. Calderon says that the enamel paint her design firm prefers is oil-based because it goes on easily and usually doesn’t stain as easily after use. For a more decorative look, she says, “You can choose an acrylic enamel paint for a smoother finish or a chalk paint for a more distressed look.” “You can achieve most design aesthetics using an oil-based paint,” she says.
Barnard adds to this idea by saying that because kitchen cabinets are often touched, it’s important to choose a paint that will last. “Glossy paints are often known for being strong, but there are many other durable paints that come in different finishes,” she says. Also, it’s important to remember that choosing low- or zero-VOC paints is good for the whole house, but Barnard says it’s especially good for the kitchen because people may touch the paint more often there than in other rooms.
Benjamin Moore and Behr are just two of the many brands that make special paints for doors, cabinets, and trim. These paints are easy to use and level themselves, giving the job a nice, smooth finish. However, any good paint—either enamel-based paint or latex paint—should work well and last long enough to handle daily use and cleaning in the kitchen. Remember that a gloss or semi-gloss finish will last the longest and be easier to clean and scratch.
And no matter what you do to solve the puzzle of how to paint your kitchen cabinets, don’t forget how important it is to test paint samples “to see how it will look throughout the day and with the space’s lighting,” says Barnard. She also says, “It’s helpful to see how the paint colour will look or feel with the materials that are already in the kitchen.”
How do I pick the best colour paint?
You might as well choose a colour you love for your kitchen cabinets if you’re going to paint them. Kitchens are becoming more and more green, in all its shades and hues. That’s a good place to start, whether you like a jewel tone or an earth tone. White paint will always look good, and it probably goes with everything you already have in your kitchen. Just keep in mind that it might show stains and dirt. For a sleek look in your kitchen, black is a bold and moody choice.
Take a look at the other things in your kitchen to help you choose a cabinet colour. To come up with a good colour scheme, write down the things you already love, like the hardware or the fixed appliances. The cabinets in your kitchen should match the countertops. What colour paint would make your backsplash stand out? What colour would make the floor stand out? Remember that you can always paint again if you change your mind.
How much room do I need for this?
There is some extra space for this project. You’ll need a big enough space to lay down cabinet doors flat so that paint doesn’t drip while the first/second coats dry. There must be enough room for everyone if you don’t want to work in groups. It’s fine to plan to borrow sawhorses and use your front yard, but make sure you check the weather first. (It doesn’t rain when the cabinets are freshly painted.) You could also get things flying onto your fresh paint job. If you’re painting inside (a garage or covered patio works great), get some small plastic tripods. Don’t forget to open the windows and turn on the fans to get some airflow. Are you ready to paint these kitchen cabinets? Good job. Here are easy, step-by-step instructions on how to paint your kitchen cabinets, with tips from Rick Watson, who is the vice president of product innovation at Sherwin-Williams.
Should cabinets be sanded down before they are painted?
You will end up with a messy project if you skip this step, which takes time. The reason Calderon and other experts say sanding cabinets before painting them is so important for people who want to paint their cabinets. “Sanding doors makes the surface rough, which helps the paint stick.” “It will also help get rid of any sheens and flaws left over from painting the door, giving it the smoothest finish possible,” she says. “If the cabinets you want to paint have already been painted, you must not only sand off the old paint but also sand them a second time to smooth out the wood and get it ready for a new coat of paint,” Barnard says that priming the cabinets after sanding them is another important step that will make the paint look better and be more even.
Yes, you should sand your kitchen cabinets twice: first to get rid of the old paint, then to make the wood smooth. Get ready to work out your arms!
How should I paint my kitchen cabinets the best way?
When you paint your kitchen cabinets, you’ll probably need both a roller and a brush. Soloff says that rollers are best for large flat areas because they “ensure a smooth, streak-free finish.” It’s also likely that the rollers speed up the work a bit. Barnard tells people who do their projects to keep in mind that rolling can make the texture a little bubbly. “A smaller, better roller will help get rid of any textures you don’t want,” she says. Soloff says that brushes “are great for fine details, edges, and corners.” You can also use a brush to get into cracks and crevices, like the inside edge of a traditional Shaker door. Also, Barnard says that many people might like the way brushed-on colour looks when painting kitchen cabinets to make them look a little more old. “By using both, you ensure an even coat, attention to detail, and a professional-looking result,” says Soloff.
To paint kitchen cabinets, you will need:
- Painter’s tape
- Trisodium phosphate (TSP) heavy-duty degreaser
- Wood filler
- 60-grit sandpaper (coarse)
- 360-grit sandpaper (fine)
- Sanding block or an orbital sander
- All-surface primer
- Durable cabinet paint
- A paintbrush
- Four-inch foam roller
- Drop cloths
Step 1: Gather painting supplies
When it comes to choosing brushes and rollers, Watson says, “If you end up going with the dollar-store brushes and the $5 gallon of paint, it’ll look like it.” Take the time to talk to a paint store employee about each supply. It takes time and isn’t worth the low price to have to pick brush bristles off your cabinet doors or paint over brushstrokes that don’t look good. You can also use the better supplies for longer for other do-it-yourself projects. It’s also worth the time to set up a good painting area because it will save you time when it’s time to clean up. When you paint cabinets, a drop cloth might be one of the most useful things you have.
Step 2: Remove cabinet doors, drawer fronts, and hardware
Before you start painting, take all of the cabinet doors and drawer fronts off their hinges. This will help you get everything done much faster. If you don’t want to put together the cabinets to be one of the hardest jigsaw puzzles you’ve ever done, give each one a number and the same door number. (You’ll be glad you did it.) Take out all of the cabinet hardware, even if you plan to buy new hardware to replace the old one. You need to start over. You’ll be less frustrated with the project if you plan and prepare ahead of time. Leave the cabinet boxes where they are and tape off the edges where they touch the wall with painter’s tape. There aren’t many decorations on the cabinet boxes, so they’re easier to clean up and paint while they’re on the wall. As far as the outside goes, you should paint it. But it’s up to you if you want to clean up the inside too.
Step 3: Clean the desk and cabinets
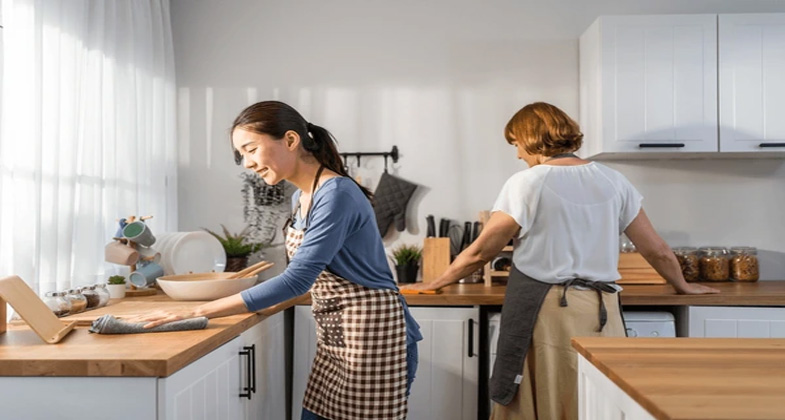
It’s said that 80% of all painting complaints in kitchens are caused by not properly preparing the surface. You should not be one of those people. Clean off months or even years of cooking splatters and kitchen grease from the cabinet doors so that the paint sticks better. Don’t try to trick the system if you think you can just sand all that dirt off. Dirt might be pushed right into the wood when you use sandpaper to try to get rid of it. A deglosser is what some people choose, but a cleaner that can do more than one thing should work just as well. To get rid of oil, dirt, and grease, clean your kitchen cabinets well with a TSP degreaser.
Step 4: Fix nicks and scratches with wood filler.
Check for flaws like deep scuffs, nicks, holes, gouges, or scratches. To fill the hole, squeeze the wood filler into it and then use a putty knife to spread the rest of it out. Follow the directions on the wood filler tube to let it dry before moving on to the next step. You won’t believe how much this step can simplify the painting process and turn the old cabinets into brand-new ones.
Step 5: Make the cabinet doors smooth.
“Sanding knocks the surface of the cabinet down and lets the primer soak into the wood, making it stick,” says Watson. If your cabinets only need light sanding, you can do it by hand with 60-grit sandpaper or sanding blocks. If you don’t have steel arms, though, you should buy an orbital sander. Rent one from a home improvement store or borrow one from a friend who likes to do their projects. Note this: Taking off old paint can make dust or fumes with lead in them if your cabinets were put in and painted before 1978. If you don’t think your cabinet doors have lead paint on them, you should still wear a mask when you sand them. To finish this step, use a tack cloth to wipe down the surface of the cabinet to help get rid of any dust that is still there.
Step 6: Put on a coat of primer.
Talk to the staff at the paint store to make sure you have the right primer for the job. One good choice for laminate cabinets is Zinsser Primer for All Surfaces. Another is Behr Kitchen, Bath, and Trim Stain-Blocking Primer & Sealer. Zeiss Bin Advanced Shellac primer is a good choice for wood cabinet doors. Before you start painting the outside, test a small area of the cabinets that you can’t see. “If the primer fish-eyes, which means a bubble forms on the surface, that means the surface isn’t clean enough,” says Watson.
Step 7: Sand the doors of the cabinets again.
Note: You don’t have to do this step. But if you want to be like the Type A crowd or make your paint job look very professional, you might want to sand the dry primer to get rid of any grit, dust, or hairs from the brush or roller. You will need fine-grain 360-grit sandpaper for this extra step. The extra sanding will make sure the finish is smooth. You’ll thank yourself in a year, and you won’t have to worry about painting the kitchen cabinets again. Get a new piece of tack cloth to wipe off the dust when you’re done. You can also use an attachment for a vacuum to clean the grooves in cabinet doors.
8th Step: Paint the kitchen dressers
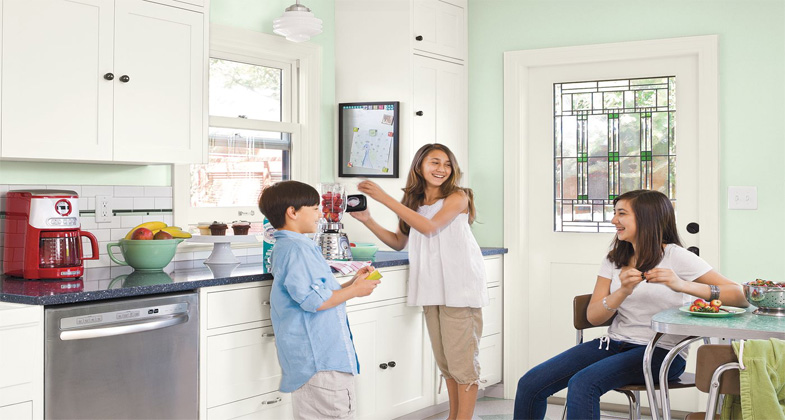
Clean, sand, and prime your kitchen cabinets. Then, use a damp rag or microfiber cloth to wipe them down and get rid of any dust that may have settled on them. Watson says that this paint can be used on both inside and outside surfaces. Since people use kitchens a lot, you should pick a paint that lasts a long time. It’s easy to clean, and the Backdrop Premium Cabinet & Door is the right paint for a kitchen where the cook makes a mess. You can choose any paint finish you want, whether it’s high gloss, no gloss, flat, or matte. There’s also no need for a clear top coat to protect it. He says, “Just put on a second coat of your pigmented paint if you want extra protection.” You could also use a paint sprayer or spray paint. Before putting your cabinets back together, let the paint dry completely. Check the manufacturer’s instructions to get an idea of how long it will take to dry, which is usually between one and eight hours.
Step 9: Put the cabinet doors and hardware back in place.
The new look for the kitchen is almost done. Once the cabinet doors and drawers have dried, put them back on the cabinet frames. This is a great time to use labels. Then put the knobs and other hardware back in place. Without a doubt, people will notice how different the kitchen looks now.





Leave a Reply